° ☾°Namaste Collective – DIY HENNA° ☽°

Ever longed to be able to create awesome henna art on yourself but deep down know that you have the capability of drawing a stick man? Well, fear no longer ladies, because we have found the perfect kit to give us hope for a brighter, more creative future! Let us introduce you to Namaste Collective, the awesome henna pack that has just hit the Polly shop!

CLICK HERE TO SHOP

IMG_2504 copy

With a tracing pen, easy to use applicator bottle and booklet full of beautiful designs, Namaste henna packs provide you with what you need to get started. Not to mention, they provide the highest quality, completely natural ingredients and with no hidden nasties they are 100% pure and safe.

-☽ -▽- ☼ -▽ -☾-♡ -☽ -▽- ☼ -▽ -☾-♡ -☽ -▽- ☼ -▽ -☾-♡ -☽ -▽- ☼ -▽ -☾-

IMG_4299-1IMG_4673

-☽ -▽- ☼ -▽ -☾-♡ -☽ -▽- ☼ -▽ -☾-♡ -☽ -▽- ☼ -▽ -☾-♡ -☽ -▽- ☼ -▽ -☾-

Our top tip for you to create the perfect henna is be patient and take your time, practice makes perfect!!

If your feeling creative and up for the challenge CLICK HERE TO PURCHASE


x

DIY | Christmas Tree

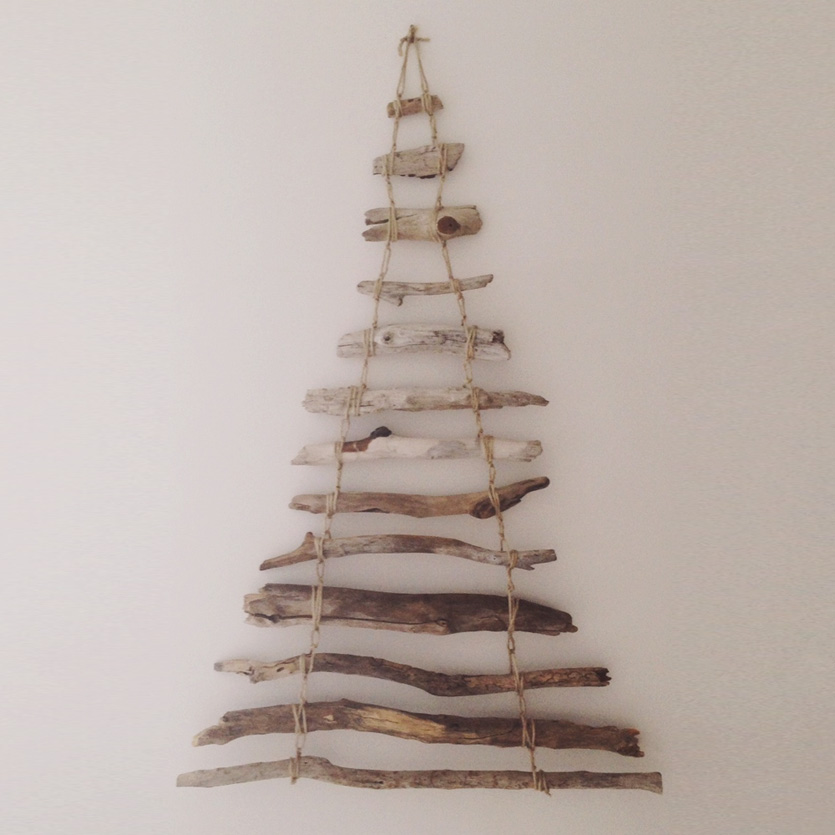
It’s December 1, aka officially Christmas time! Leave it to Brogan, our photographer/resident DIY specialist, to create the coolest Christmas tree we’ve ever seen.  Her unique hanging tree made of driftwood and twine is beachy, beautiful, and best of all– SO affordable and fun to make.  Read on to see how she did it so you can step up your Christmas game this year and make your own.

What you’ll need: 

  • Driftwood
  • Twine (or any sturdy string)
  • Scissors
  • Nail with a hook to hang tree from wall

How to: 

1. COLLECT YOUR DRIFTWOOD. Go to a beach with plenty of driftwood and collect a variety of shapes, sizes, and colours. This can be the tricky step as most beaches are cleaned up and stripped of all of their awesome driftwood (I found mine in Mackay).

Driftwood

2. LAY OUT YOUR TREE. Once you have your collection of driftwood, it’s time to lay out your tree on the ground. Arrange the sticks by size so that they form the shape of a tree (longest at the bottom, shortest at the top). The number of pieces/rows will depend on how tall you want your tree to be (I used 13). There are many different ways you can create a tree – so remember there’s no set look.

3. HAMMER. Hammer your nail into the wall where you want the top of the tree to hang from.  Tip: If you’re using fairy lights, you’ll want to choose a wall where there is access to a power outlet nearby to plug them in.

4. CUT & TIE YOUR STRING. Now that all your driftwood is laid out, cut 4 LONG pieces of twine (about 5 meters each). The lengths of these pieces will determine how many rows of driftwood you can fit on your tree, so it’s best to over-estimate to be safe. Once you cut all four pieces, line up the ends of the string and tie them together in a super tight triple-knot. Once you have your sturdy knot, place it on top of the hook part of your nail. Divide the strings so that two are hanging down from each side of the hook. This is now the point of your tree!

5. WRAPPING & KNOTTING. Once you have the point of your tree, start to attach each piece of wood, working from the shortest to the longest.  Take the strings that you divided and wrap them twice around the ends of each piece of wood (the left strings on the left end, the right strings on the right end). Make sure that they are hanging straight and not lopsided, and then tie a double-knot on each side to secure.  Side note: I did this by myself, but this step would’ve been a lot easier if I had someone to help me. I ended up kind of balancing the wood on my head while I tied… it can be done but it’s a bit awkward. 

6. REPEAT. When you’ve finished knotting and wrapping the first piece of wood, repeat the process for each new row. Try to make the gaps between the rows as even as possible.
01

7. DECORATING. And wallah!!… it’s now time to decorate with fairy lights, stars, spray painted pine cones & all the Christmas goodies you can get your hands on!!  I got my fairy lights from Ikea.

02

P.S. If you’re still feeling a little lost, have a squiz on Pinterest at the endless possibilities of driftwood Christmas trees:  https://www.pinterest.com/explore/driftwood-christmas-tree/


DIY | The Art of Wall hanging

Hanging that favourite print on the wall sounds like an easy task, all those Pinterest pics of “so hot right now” apartment walls seems so simple! Here we are with our little A4 print hanging all alone near a plant too far away,  left felling a little underwhelmed with the end result. Don’t worry baby, we got you covered!

STEP ONE

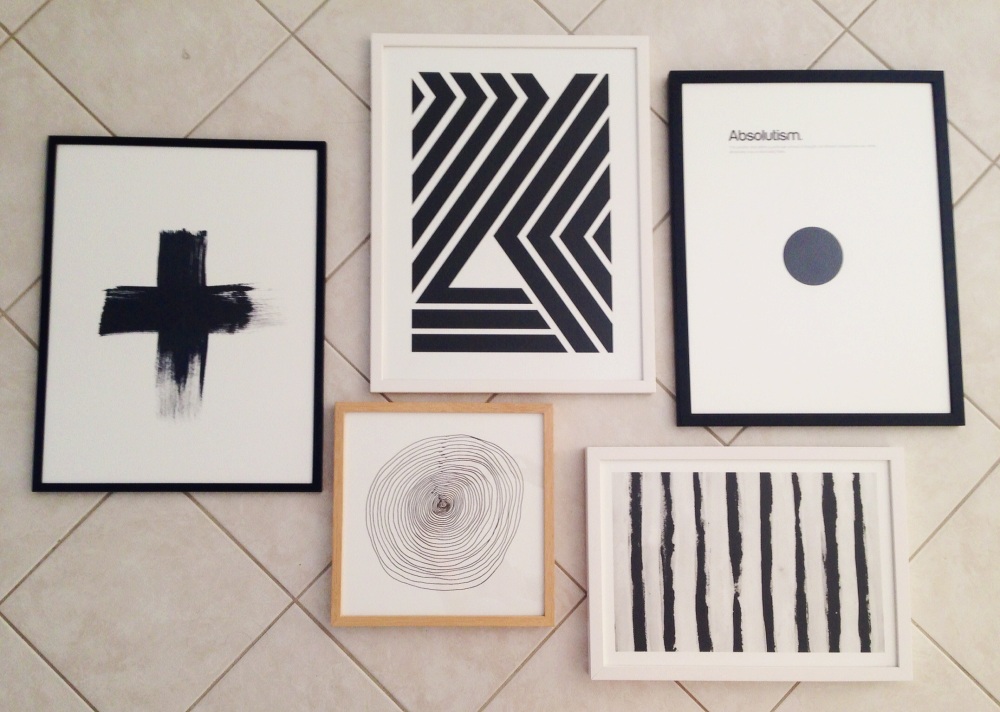
Once you have your artwork all framed lay them out on the floor how you think you would like them to work together on your wall. Make sure you pic the best frames that match each print perfectly. You don’t need to have them all matching to have a hot wall.

play around with different placements on floor

STEP TWO

Take some scrap paper and trace around the edge of each frame, from here you want to cut out each frame size.

STEP THREE

Using adhesive such a Glu Tac, start placing  your most centered frame on the wall. Once you are happy, start placing the other frame sizes around your main artwork. Keep checking that you like the spacing.

trace frames onto paper and then trial placement on wall

STEP FOUR

Now is the time to get your hooks on! Depending what kind of hook you are using (nail or removable) you can measure the appropriate distance using your patterns on the wall for the best results.

STEP FIVE

Hang those bad boys! Take a step back and admire that killer wall you have going on!

DIY | Wall Hang step back DIY | Wall hang Fin

 FIN!

DIY – PARTY Crates!

We have serious Craft Cat in our Office, Miss Brogan our Photographer is always doing these AMAZING projects on the weekend and we just HAVE to share them with you! We have an easy step by step guide below on how to make your own party ASTRO TURF CRATES! Be the ENVY OF THY NEIGHBOUR!

Things you will need

  • Recycled Milk Crates – how many do you want for your space?
  • Buy a meter square sheet of Astro Turf from Bunnings for about $30
  • Zipties – Cheap as cheap….about a dollar for a packet also from Bunnings
  • Use Sharp scissors or a stanley knife…blunt ones make it way too challenging and we want to eliminate any frustrations 😉
  • You can find different coloured crates or try spray painting them to any gorgeous colour that you’re LOVING right now.

DIY FINAL

STEP 1

Place the turf over a crate.

Use the corner of the turf as a guide for the edges.

Use those sharp scissors to cut the Turf to the same size as the top of the crate.

Alternatively, you could place the turf on the ground grass side down, and put the crate on top and cut out the shape like this.

DIY 1

DIY 2

STEP 2

Wrap the Zip ties around the top crate edges and through the matting of the Turf about a few cm’s from the edge. Tighten to attach the turf to top of the crate. Cut any ends of the ties off after it’s attached. It’s as easy as that!!

Get your cocktail swivels ready babes and PARTY ON!

DIY 3

A to the Z – Tie-Dye T

The über creative team at NPW have brought us a delightful DIY Tie-Dye Kit! One of our fave cuties Abby decided to get her hands dirty and add a bit of that 70’s vibe to her wardrobe!  Check out the HOW TO;

You will need:

  • A light coloured garment
  • A protected working area
  • A bucket or sink
  • Plastic bag or wrap
  • Water

Kit includes:

  • Dye bottles
  • Soda ash
  • Rubber bands
  • Rubber gloves

To Prepare:

To protect the space you plan to get creative in, ensure you have laid out plastic sheeting or anything of the likes which you can dispose of afterward. This will stop any dye spilling onto your work surface. To be extra careful, wear old clothing and shoes just in case! Pre-wash the garment you would like to use to ensure there are no impurities.


Step 1: Tying your garment

There are various ways to tie your garment to create the perfect tie-dye pattern! If you’re feeling adventurous, this is the perfect opportunity for you to come up with your own technique. We went with spiral, here’s how…

Lay the garment flat and take a section from the middle and twist it until you have created a spiral shape. Keep twisting until this is no longer possible and your garment is nice and compact. Secure the spiral by placing 2-3 rubber bands around it like so.

2 1345


Step 2: Soda ash solution

Pop your gloves on to prepare the soda ash solution. Using a large bucket or sink, add one 3.5oz of soda ash mixed with 2 litres of warm water. This will be enough for about 6 tees (use less if needed). Stir the solution with your hands until the soda ash has completely dissolved. Place your garment into the solution and let it sit for 30 minutes. Remove from the solution, and get rid of any excess water by squeezing as much out as you can. The garment should be damp, but not dripping wet. Dispose of leftover soda ash solution and flush with plenty of water.


6

Step 3: Dying (THE FUN PART!)

Using your glove-protected hands, place the garment on your protected working area. Add warm water to your dye bottles up to the line indicated on the side of the bottle. Pop your lid back on and carefully shake the water to loosen all the powder to form your dye colour. Once you’re happy with the consistency of the dye, start to squirt the dye on your garment in desired spots! This is where you can make the finest mess! Use as many colours as you like ensuring the garment is completed saturated in dye! Once you’re finished with the dye, leave the garment tied up and allow to sit for 8-24 hours (overnight is best). Pop it into a plastic bag and secure it tight so the dye does not dry up.

7 9 10 11


Step 4: Washing

Popping your gloves back on, remove the rubber bands and rinse the garment under cold water until all the dye has washed away. Wash your garment on its own, on a normal wash setting, than allow it to dry. Once your garment is dry, it is ready to wear!!

FIN.

12 delete

All In The Stars

Wander into the magic and mystical world of birthstones and gems. We are starting to see a lot of DIY constellations and astrology influences trending and we want to be a part of it! Fortune, love, luck, peace – these alluring birthstone gems have the power to provide a way of life that is suited to each individual. Everyone wants to be a mystic and we are cast under the spell of these beauties not only by their meanings but also the beautiful pop colours that come from the gem itself. Treasure these beauties forever as these are bound to bring true meaning and significance in your life and make it your statement!

All In The Stars - Kris Nations at Princess Polly
All In The Stars